Pi Mono: What It Is, Architecture & Composable AI Agent Guide
What is Pi Mono (badlogic/pi-mono)? Explore the composable open-source AI coding agent monorepo by Mario Zechner: unified LLM gateway, CLI, and extensions.

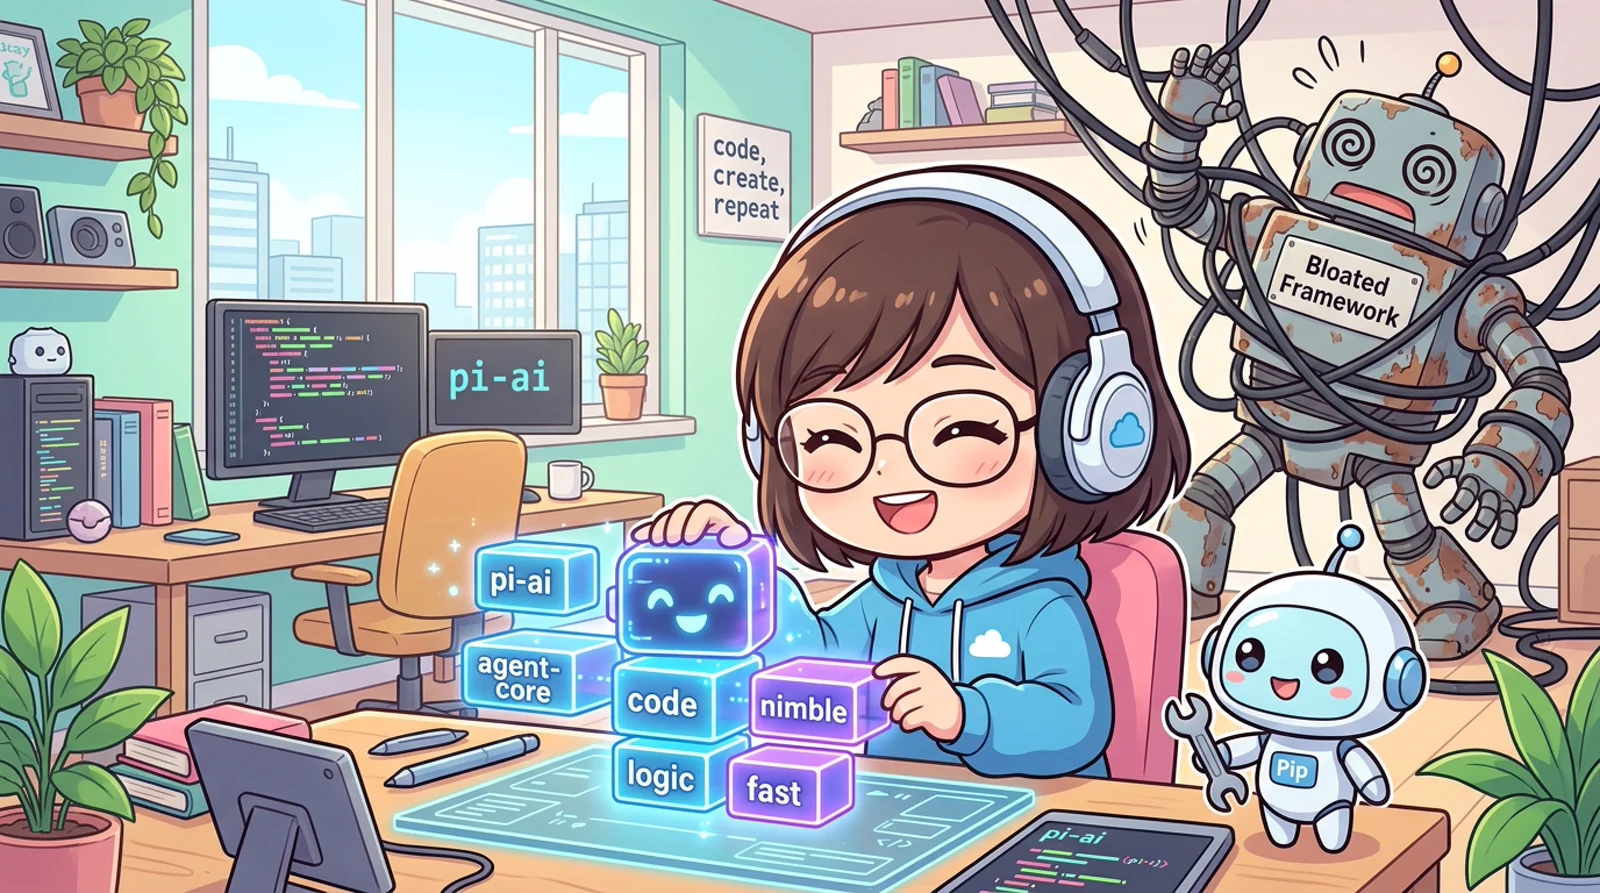
Welcome back to another GitHub deep dive! Today, we’re cracking open Pi Mono, a monorepo by Mario Zechner (the creator of libGDX) that takes a radically different philosophy to AI coding agents.
While tools like Claude Code, Cursor, and Aider bake in features like sub-agents, plan modes, and permission popups, Pi says: “Build it yourself.” It gives you the primitives - a unified LLM API, an agent runtime, a TUI framework, and a web UI library - and lets you compose the exact workflow you need using TypeScript extensions.
Repository: badlogic/pi-mono
Let’s break it down using our Mental Model - then animate it in Part 2 so the packages are not just names on a list.
TL;DR
Quick Answer Box (Google Search Featured Snippet):
- What is Pi Mono? Pi Mono (
badlogic/pi-mono) is an open-source TypeScript monorepo by Mario Zechner that decomposes an AI coding agent into composable, un-opinionated primitives (pi-ai,pi-agent-core,pi-coding-agent,pi-tui,pi-web-ui).- Why is it called the Anti-Framework? Unlike Claude Code, Cursor, or Aider that enforce sub-agent abstractions, rigid plan modes, and proprietary conventions, Pi Mono provides raw agent loops, a unified multi-LLM gateway, and lightweight TypeScript extensions so developers build their own workflows without forking core.
- Core Engineering Architecture: A single unified spine (
pi-coding-agentCLI →pi-agent-coreevent runtime →pi-aimodel gateway) with 4 surgical tools (read,write,edit,bash) and JSONL branchable session trees (/tree,/fork).- Official Repository Link:
badlogic/pi-monoon GitHub.
- What it is: A TypeScript monorepo that splits an AI coding agent into composable packages - LLM API, agent runtime, TUI, web UI, extensions, Slack bot, GPU tooling.
- Why it matters: You get a working CLI agent on day one (
read,write,edit,bash) without surrendering control of sub-agents, plan mode, permissions, or provider choice. - Best for: Developers who want to shape their agent workflow in code, not negotiate for it in upstream issues.
- Key differentiator: One spine -
pi-coding-agent→pi-agent-core→pi-ai- with everything else (extensions, session trees, Slack, self-hosted models) attaching as optional surfaces.
Beginner Map
Do not read Pi Mono like a package checklist. Read it as a story with one recurring path: your prompt enters the CLI, the agent loop runs, pi-ai talks to a model, tools fire, output renders in the TUI.
- Pass 1: grasp the house-vs-toolkit metaphor in Part 1 (opinionated product vs composable primitives).
- Pass 2: watch the eight-beat scene in Part 2 and memorize the spine.
- Pass 3: dive Part 3 in beat order - extensions, handoffs, sessions, Pi Mom, GPU pods.
- Pass 4: install the CLI in Part 4 and run the first exercise below.
| Term | Question it answers |
|---|---|
pi-ai |
How do I call 20+ LLM providers with one API? |
pi-agent-core |
Who runs the tool loop, events, and steering? |
pi-coding-agent |
What do I actually install and type into the terminal? |
| Extension | How do I add plan mode, sub-agents, or MCP without forking? |
| Session tree | How do I branch, fork, and compact conversation history? |
pi-pods |
How do I point the same agent at a self-hosted vLLM model? |
First Practical Exercise
After Part 4’s install steps, run this five-minute smoke test:
npm install -g @mariozechner/pi-coding-agent
pi
Then ask: “List the files in this directory and suggest which one I should open first.” Watch the four default tools fire. Type /tree to see the session as a branchable tree - not a flat scrollback. If that click lands, the rest of the article is detail on arrows you already saw animate.
Part 1: Foundations (The Mental Model)
Think of most AI coding agents like a pre-built house. The floor plan is fixed, the walls are where they are, and if you want a skylight, you’re submitting a PR and hoping the maintainer agrees.
Pi is more like a construction toolkit. It gives you the steel beams (the LLM API), the electrical wiring (the agent runtime), the interior design tools (TUI & Web UI), and says: “Go build your house.”
The result? A coding agent that ships with 4 default tools (read, write, edit, bash) and is immediately useful - but also an agent you can fundamentally reshape without forking the codebase.
The Mental Model: Pi Mono = Unified LLM API + Stateful Agent Runtime + Terminal UI Framework + Web Components + Extension System = Your AI Agent, Your Way.
Those five pieces are abstract labels until you see them as real packages wired together. Part 2 maps them to the monorepo - and animates how a prompt moves through the stack.
Part 2: The Investigation
Part 1 gave you the philosophy. Part 2 gives you the wiring diagram.
Pi Mono is a TypeScript monorepo with 7 packages, each solving one slice of the AI agent stack. They are not interchangeable plugins you pick from a menu - they stack:
- Product layer - what you install and run (
pi-coding-agent, plus satellite products likepi-momandpi-pods) - Runtime layer - the agent brain, terminal UI, web UI, and extension hooks
- Foundation layer - the unified LLM API (
pi-ai) and the 20+ providers it talks to
A flat README list hides that shape. So before we open each package in a table, watch how one prompt travels through the stack - and how the same spine powers extensions, provider switches, session trees, Slack bots, and GPU deployments.
The scene below plays in eight beats. Treat them like chapters of the same story:
- Seven-package stack - the layered monorepo appears
- Interactive agent loop -
pi-coding-agent→pi-agent-core→pi-ai→ LLM - Extension system - TypeScript hooks reshape the CLI without forking core
- Cross-provider handoff - swap models mid-conversation, keep tool state
- Branching + compaction - JSONL session tree (
/tree,/fork,/compact) - Pi Mom bot - Slack-side assistant that manages its own sandbox
- GPU pod management - self-hosted models via
pi-pods+ vLLM - Your agent, your way - pull back to the full composable picture

💡 Interactive architecture diagram powered by Markdy. You can copy Markdy code and test it live in the Markdy Studio Playground.
The spine to remember is pi-coding-agent → pi-agent-core → pi-ai → LLM. TUI rendering, session files, Slack, and GPU pods attach to that path - they do not replace it. That is Pi’s architectural bet: one composable loop, many optional surfaces.
Use this map when a beat finishes and you want the written deep dive:
| Scene beat | Section below |
|---|---|
| Extension system | §1 Extension System |
| Cross-provider handoff | §2 Cross-Provider Handoffs |
| Branching + compaction | §3 Session Branching & Compaction |
| Pi Mom bot | §4 Pi Mom |
| GPU pod management | §5 GPU Pod Management |
The ASCII map below is the same diagram, frozen for reference while you read the package table:
┌──────────────────────────────────────────────────────────────┐
│                     pi-coding-agent                          │
│  Interactive CLI with sessions, branching, compaction         │
│  Extensions | Skills | Prompt Templates | Themes             │
├──────────────────────────────────────────────────────────────┤
│        pi-agent-core        │        pi-web-ui              │
│  Agent loop, tools, events  │  Chat panels, artifacts       │
│  Steering & follow-up       │  JS REPL, attachments         │
├─────────────────────────────┤  CORS proxy, IndexedDB        │
│           pi-ai             ├────────────────────────────────┤
│  Unified multi-provider API │         pi-tui                │
│  20+ LLM providers          │  Differential rendering       │
│  Cross-provider handoffs    │  Editor, Markdown, Image      │
│  Tool calling & validation  │  Synchronized output          │
├─────────────────────────────┼────────────────────────────────┤
│          pi-mom             │         pi-pods               │
│  Self-managing Slack bot    │  GPU pod management           │
│  Docker sandboxed           │  vLLM auto-configuration      │
│  Events & scheduled tasks   │  Multi-GPU support            │
└─────────────────────────────┴────────────────────────────────┘
The 7 Packages, Explained
Each row maps a node from the scene to what it ships in npm. Read from the foundation up: start with pi-ai, then pi-agent-core, then the product and satellite packages you actually run day to day.
| Package | What It Does |
|---|---|
| pi-ai | The foundation. A unified API that talks to OpenAI, Anthropic, Google, Bedrock, Mistral, xAI, Groq, Cerebras, and more. One stream() call, any provider. Relies on resilient stream sockets (see TCP vs UDP Handshake & Connection Lifecycles) to guarantee zero packet loss during continuous token streaming. |
| pi-agent-core | The brain. A stateful agent with tool execution, event streaming, steering (interrupt mid-tool), and follow-up queues. |
| pi-coding-agent | The product. An interactive terminal agent with session branching, auto-compaction, file references via @, and a full extension API. |
| pi-tui | The screen. A terminal UI library with differential rendering, flicker-free output, and components like Editor, Markdown renderer, and inline Image display. |
| pi-web-ui | The browser. Web components for chat interfaces, JavaScript REPL, artifact rendering (HTML, SVG, Markdown), and IndexedDB storage. |
| pi-mom | The assistant. A Slack bot that self-manages its environment - installing tools, writing scripts, and building its own CLI skills autonomously. |
| pi-pods | The GPU manager. Deploy and manage LLMs on remote GPU pods with automatic vLLM configuration for agentic workloads. |
Part 3: The Diagnosis
The animation showed the highlights; this section opens the hood.
Each beat in the scene maps to a design choice that separates Pi from opinionated agents. We walk through them in the same order - extensions, provider handoffs, session trees, Pi Mom, GPU pods - with enough detail to know when each piece matters.
1. The Extension System: Build Anything
In the scene, the Extension system beat showed hooks firing into pi-agent-core without touching core source. That is Pi’s killer feature in practice. Extensions are TypeScript modules that can:
- Replace built-in tools entirely (swap
writefor a version that auto-commits to git) - Add custom UI components (status lines, headers, overlays - even Doom)
- Implement sub-agents and plan mode (Pi intentionally doesn’t ship these, so you build them to match your workflow)
- Gate permissions and protect paths
- Integrate MCP servers
- Build SSH and sandbox execution
export default function (pi: ExtensionAPI) {
  pi.registerTool({ name: "deploy", ... });
  pi.registerCommand("stats", { ... });
  pi.on("tool_call", async (event, ctx) => { ... });
}
The philosophy is clear: features that other tools bake in can be built as extensions, keeping the core minimal and your agent shaped exactly how you work.
2. Cross-Provider Handoffs
The Cross-provider handoff beat showed pi-ai swapping Claude for GPT mid-session while preserving tool calls. Most LLM libraries lock you into one provider per conversation. Pi’s pi-ai package supports seamless handoffs:
import { getModel, complete, Context } from '@mariozechner/pi-ai';

// Start with Claude 3.7 Sonnet for deep architectural thinking
const claude = getModel('anthropic', 'claude-3-7-sonnet');
const context: Context = {
  messages: [{ role: 'user', content: 'Analyze this complex concurrency bug and plan the refactor.' }]
};
const analysis = await complete(claude, context);
context.messages.push(analysis);

// Seamlessly hand off execution to a high-speed coding model
const qwen = getModel('fireworks', 'qwen-2.5-coder-32b-instruct');
context.messages.push({ role: 'user', content: 'Implement the planned fix in TypeScript.' });
const fix = await complete(qwen, context);
Thinking blocks from Provider A are automatically converted to text with <thinking> tags for Provider B. Tool calls, AST modifications, and execution results are preserved unchanged.
3. Session Branching & Compaction
The Branching + compaction beat highlighted the JSONL session file hanging off pi-agent-core. That file is not a flat chat log - it is a tree. Each entry has an id and parentId, enabling in-place branching without creating new files:
/tree- Navigate the entire session history, jump to any point, and continue from there/fork- Create a new session from any branch point/compact- Summarize older messages to free context. The full history remains in the JSONL file
This is massively useful for exploration - try one approach, branch, try another, and switch between them without losing anything. When conversational trees grow to hundreds of nodes, developers pair compaction with high-dimensional retrieval: read our primer on Vector Databases & Embeddings to see how semantic search unlocks scalable long-term memory.
4. Pi Mom: The Self-Managing Bot
The Pi Mom bot beat connected Slack to a sandboxed agent that greps its own log.jsonl. pi-mom is unlike any chatbot framework - it is a Slack bot that:
- Installs its own tools (
apk add git jq curl) - Writes its own CLI skills (need a Gmail checker? Ask Mom, she writes the script)
- Manages its own credentials (ask for tokens, store them securely)
- Runs in a Docker sandbox with full bash access
- Schedules events (cron-based periodic tasks, one-shot reminders)
Each Slack channel gets its own workspace, conversation history, and memory files. Mom compacts context automatically and can grep infinite history from log.jsonl.
5. GPU Pod Management with pi-pods
The GPU pod management beat linked pi-pods to a vLLM runtime on remote hardware. For developers running their own models, that package automates deployment:
# Setup a DataCrunch pod with NFS storage
pi pods setup dc1 "ssh root@1.2.3.4" \
  --mount "sudo mount -t nfs nfs.fin-02.datacrunch.io:/hf-models /mnt/hf-models"

# Start Qwen on a single H100
pi start Qwen/Qwen2.5-Coder-32B-Instruct --name qwen

# Interactive chat with file system tools
pi agent qwen -i
It automatically configures tool calling parsers for known models (Hermes for Qwen, GLM4 parser for GLM, Responses API for GPT-OSS) and manages multi-GPU assignments.
6. The 2026 Breakthroughs: Pico Task State Machine, Adaptive Thinking & Session Affinity
As autonomous coding agents evolved throughout 2026, Mario Zechner and contributors introduced four landmark capabilities directly into the core engine:
- The Pico Task Runtime (
pico):- Instead of unbounded, raw message dumps, Pi Mono structures execution around tagged-union task states (
pending,running,blocked,completed,orphaned) with mutable registries. - Tasks act as gates: background tool runs and subagent workers cannot arbitrarily pollute foreground context until explicit input attribution and completion events are registered.
- Instead of unbounded, raw message dumps, Pi Mono structures execution around tagged-union task states (
- Per-Model Dynamic Compaction Token Budgets (PR #8133):
- Rather than relying on a static, arbitrary context limit, Pi Mono now dynamically budgets compaction thresholds per active model architecture (e.g. 128k for Claude 3.7 / 4, 64k for DeepSeek-Flash, 32k for local vLLM Qwen 2.5 Coder). Compaction triggers only when approaching the model’s true degradation boundary, drastically preserving KV-cache reuse.
- Session Affinity & Prefix Caching (
x-session-id):pi-aiautomatically routes requests with consistent session affinity headers (x-session-id) across OpenRouter and Anthropic backends. Pinning sequential prompt turns to identical inference worker nodes elevates prompt prefix cache hit rates from 15% to over 85% - cutting round-trip latency by 60% and slashing token costs in half.
- Adaptive Thinking & Hybrid Reasoning Replay:
- Reasoning models (Claude 3.7 Sonnet Hybrid Thinking, DeepSeek-R1, GLM-5.2) generate native
<thinking>scratchpads. Pi Mono captures unsigned thinking tokens, respectsreasoning_effortparameters, and replays reasoning context seamlessly during cross-provider handoffs without triggering schema validation failures.
- Reasoning models (Claude 3.7 Sonnet Hybrid Thinking, DeepSeek-R1, GLM-5.2) generate native
Part 4: The Resolution
The final beat - Your agent, your way - is not marketing copy. It is the install path. Everything above collapses into a CLI you can run in minutes, then reshape with extensions when the defaults are not enough.
Getting Started
# Install the coding agent
npm install -g @mariozechner/pi-coding-agent

# Authenticate
export ANTHROPIC_API_KEY=sk-ant-...
pi

# Or use your existing subscription
pi
/login  # Select provider (Claude Pro, ChatGPT Plus, GitHub Copilot, etc.)
Pi gives you 4 tools by default: read, write, edit, bash. Start talking and the model will use them to fulfill your requests.
Extending Pi
Pi’s extension ecosystem is distributed via Pi Packages - bundles of extensions, skills, prompts, and themes shared via npm or git:
# Install a community package
pi install npm:@foo/pi-tools

# Or from git
pi install git:github.com/user/repo

# List, update, configure
pi list
pi update
pi config
Using as an SDK
Pi isn’t just a CLI. You can embed it in your own applications:
import { createAgentSession, SessionManager, AuthStorage, ModelRegistry } from "@mariozechner/pi-coding-agent";

const { session } = await createAgentSession({
  sessionManager: SessionManager.inMemory(),
  authStorage: new AuthStorage(),
  modelRegistry: new ModelRegistry(authStorage),
});

await session.prompt("What files are in the current directory?");
For non-Node.js integrations, use RPC mode over stdin/stdout: pi --mode rpc.
When to Reach for Pi (and When Not To)
Reach for Pi if you want an agent you can extend in TypeScript, swap providers mid-session, branch exploration safely, or wire into Slack / self-hosted GPU infra without changing repos.
Reach for Cursor or Claude Code instead if you want a polished, batteries-included IDE experience today - plan mode, sub-agents, and permission UX already wired- and you are fine adapting to their workflow.
Pi is not “better” in the abstract. It trades out-of-the-box polish for composability you own.
Related AI Agent Architectures in Our Ecosystem
If you are exploring agentic software engineering, study these complementary open-source architectures:
- Pi Agent in Practice: Setup, Custom Extensions & 5 Best Practices: Hands-on operational guide to installing Pi CLI, local/cloud routing, writing TypeScript extensions, and 5 pairing best practices.
- Understand Anything: Graphs That Teach, Not Impress: Codebase knowledge graphs combining deterministic Tree-sitter AST parsing with multi-agent semantic explanations.
- 9Router: Tiered Fallback & Free AI Coding Gateway: Zero-downtime local gateway routing across 40+ AI providers with lossless token compression.
- Taste Skill: Giving AI Coding Agents Good Taste: Enforce modern design aesthetics and typography constraints in Claude Code and Cursor.
- ZeroStack: 8MB Native Rust Coding Agent: High-performance autonomous agent in 7k lines of Rust with sub-10ms startup and tiny RAM footprint.
- Context Hub: On-Demand Docs for Coding Agents: Prevent LLM API training cutoff bugs by injecting verified method signatures before writing code.
- Orca: The AI Orchestrator for Parallel Coding Agents: Discover how multi-agent swarms execute across isolated Git worktrees and manage agent coordination.
- OmniRoute: Free AI Gateway for 290+ Providers: Resilient multi-provider traffic proxy with dynamic auto-fallback on HTTP 429 and token compression.
- Ego Lite: Autonomous In-Browser AI Agents: Lightweight browser automation executing multi-step navigation without heavy Playwright bloat.
- Agency Agents: 100+ Specialized Personas for AI Coding Teams: Discover how curated agent archetypes and role-based instruction sets scale autonomous software engineering teams.
- Strix: Autonomous AI Pentesting & Security Agents: Dynamic red-team agent squads executing and validating reproducible exploit payloads.
- I Have ADHD Coding Agent Skill: Workflow automation patterns designed to eliminate context loss and decision fatigue.
- Massive Collection of System Prompts for Different AI Models (700+ Items): Production prompt reverse-engineering from Cursor, Manus, Windsurf, and Devin with strict lazy diffs.
- GitNexus Explained: Codebase Knowledge Graph via MCP: Index large codebases into KùzuDB graph structures so coding assistants navigate blast radius without breaking unseen files.
Pi Mono vs Claude Code vs Cursor: The 2026 Decision Matrix
If you are choosing an AI coding agent engine in late 2026, here is the honest architectural trade-off:
| Dimension | Cursor / Windsurf | Anthropic Claude Code | Pi Mono (badlogic/pi-mono) |
|---|---|---|---|
| Primary Form Factor | GUI Electron IDE | Terminal CLI daemon | Composable Monorepo (CLI + TUI + WebUI + SDK) |
| Extension Architecture | Proprietary VS Code fork / MCP | Closed terminal skills | 100% Native TypeScript hooks (pi install) |
| Model Freedom | Curated model drop-down | Anthropic Claude only | 20+ Providers, local vLLM / Ollama (pi-pods), OpenRouter |
| Session Model | Flat tab history | Linear terminal scrollback | Multi-branch JSONL tree (/tree, /fork, /compact) |
| Prefix Caching Cost | Fixed subscription | Metered Anthropic billing | Session Affinity (x-session-id) cut 50% token costs |
| Air-Gapped / Self-Hosted | Cloud connection required | Cloud API required | Fully offline via local GPU pods & Ollama |
Pi Mono Frequently Asked Questions (FAQ)
1. Does Pi Mono support Model Context Protocol (MCP) servers?
Yes. While Pi Mono does not hardcode an opinionated MCP layer into core pi-agent-core, community extensions (such as @mariozechner/pi-mcp and custom TypeScript packages) allow you to register any standard MCP server (e.g. SQLite, GitHub, Brave Search, Chrome DevTools) directly into the agent’s tool loop with two lines of configuration.
2. Is running Pi Mono cheaper than a Cursor Pro or Claude Pro subscription?
For active software engineers, significantly yes. Because Pi Mono natively sends session affinity headers (x-session-id) and leverages prompt prefix caching on OpenRouter and Anthropic, repeated agent iterations reuse cached prompt prefixes at an 85%+ hit rate (costing up to 80% less than fresh input tokens). Furthermore, you can route heavy code generation to ultra-fast local or open-weights models (such as Qwen 2.5 Coder 32B or DeepSeek-Flash) while reserving frontier models solely for initial architectural planning.
3. Can I run Pi Mono completely offline on my own hardware?
Absolutely. Using pi-pods or pointing pi-ai to a local Ollama or vLLM server (http://localhost:11434/v1), Pi Mono runs with zero external internet dependencies. The 4 core tools (read, write, edit, bash) execute strictly against your local operating system without phoning home.
Final Take
| Aspect | Traditional AI Agents | Pi Mono |
|---|---|---|
| Features | Pre-built, take-it-or-leave-it | Extension-based, build what you need |
| Providers | Usually locked to 1-2 | 20+ providers, mid-session handoffs |
| Session Management | Linear history | Tree-structured branching with compaction |
| Sub-Agents | Built-in or nothing | Build your own via extensions |
| Core Philosophy | Opinionated | “Aggressively extensible” |
Pi Mono is for developers who see their AI coding agent as a tool that should adapt to their workflow, not the other way around. It trades a polished out-of-the-box experience for radical composability - and backs it up with a genuinely elegant set of primitives.
If the eight-beat scene, the spine, and the five-minute smoke test all felt coherent, you already have the mental model. The repo is MIT-licensed, actively maintained, and backed by a growing Discord community. If you’ve ever wished your coding agent worked differently, Pi says: make it so.
Student First Assignment
Build your first custom Pi-mono extension in 30 minutes:
- Clone the repository and run
npm installin the monorepo root. - Create a simple TypeScript extension file inside
packages/coding-agent/extensions/that intercepts agent tool calls and logs execution latency. - Launch
piin interactive terminal mode with your custom extension active and inspect the logged telemetry.
Related posts
- AI & Agents
i have adhd Skill: Claude Code & Cursor Setup, 10 Rules Guide
i have adhd skill for Claude Code, Cursor and Gemini: stops agent distraction loops, injects working memory, and cuts token bloat by 60% for ADHD developers.
17 min readRead → - AI & Agents
OmniRoute: Complete Local AI Gateway Guide for 290+ LLMs & MCP
What is OmniRoute? Guide to the open-source local AI gateway: multiplex 290+ LLMs, stop 429 rate limits with auto-fallback, and native MCP for Claude Code.
16 min readRead → - AI & Agents
GitNexus: What Is It? MCP Codebase Graph for AI Agents (Cursor & Claude)
What is GitNexus? Index any codebase into KùzuDB via 7 MCP tools - stop AI agents breaking refactors with blast-radius queries before they edit code.
16 min readRead → - AI & Agents
Ego Lite: What It Is, How It Works & AI Browser Agent Setup Guide
Ego Lite (citrolabs/ego-lite): AI browser agent for Claude Code and Cursor automating the web inside isolated Spaces with real cookies, zero CAPTCHA.
16 min readRead →